7-Point Bathroom Renovation Checklist: What to Decide Before You Start
The essential layout, plumbing, and electrical decisions you must lock in before construction starts—because you can't change them later.
A bathroom renovation has two kinds of decisions: the ones you can change your mind about later (paint color, towel rail finish, the brand of tap) and the ones you genuinely cannot undo without ripping out finished work (where the door swings, where the plumbing sits, where the ventilation goes).
This checklist is built around that second category — the decisions that need to happen first, in the right order, before tiling, plumbing, or electrical work begins.

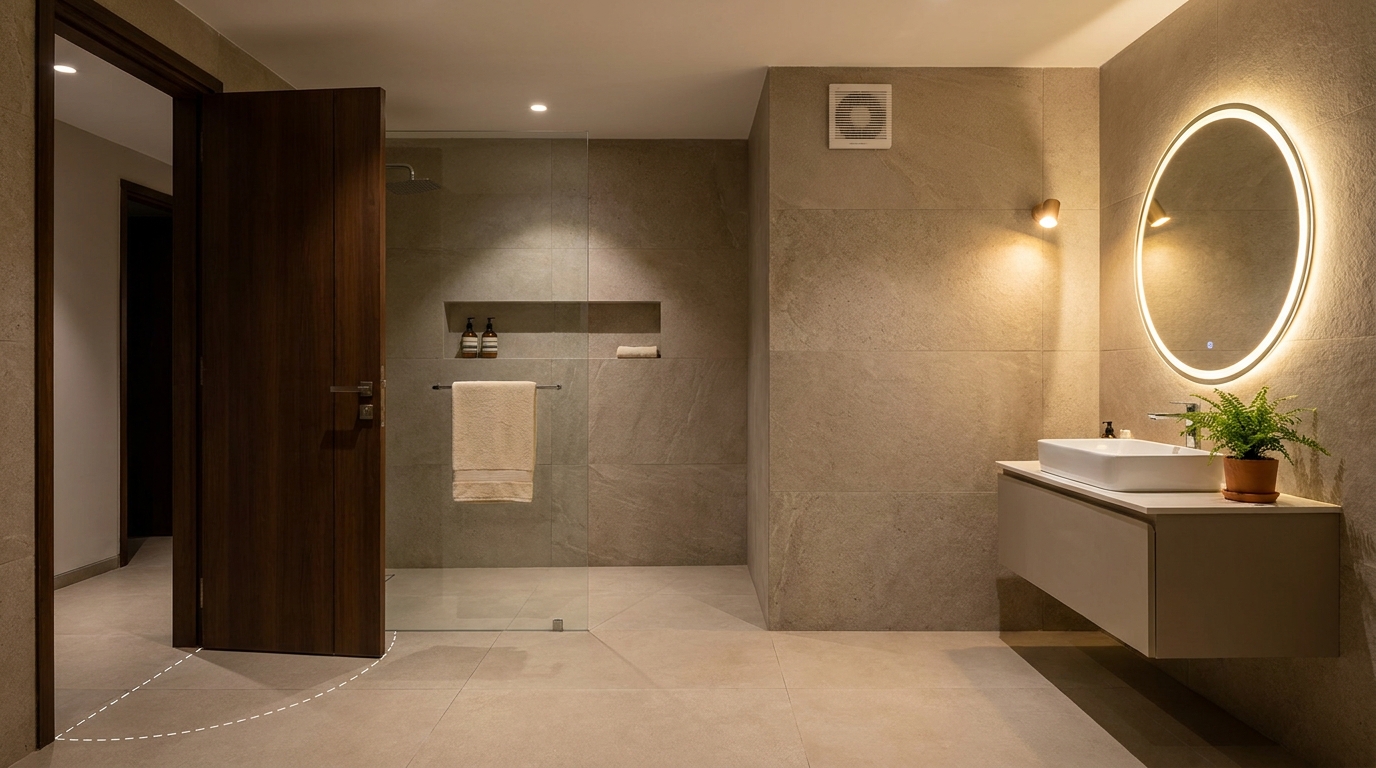
Door Swing and Space Planning
The problem: In a small bathroom, an inward-swinging door can sweep across a third of the usable floor. Combine that with a shower partition placed without accounting for the door's swing radius, and you've built a bathroom that feels cramped no matter what materials you choose.
What to check:
- Does the door open into the main walking path or into dead space?
- Is there a clear swing radius once the shower partition is in place?
- Would an outward-opening or sliding door actually serve the space better?
Why it's first on this list: Everything else in this checklist — tile layout, fixture position, storage placement — depends on the actual usable floor space once the door swing is accounted for. Get this wrong, and every other decision is built on a flawed foundation.
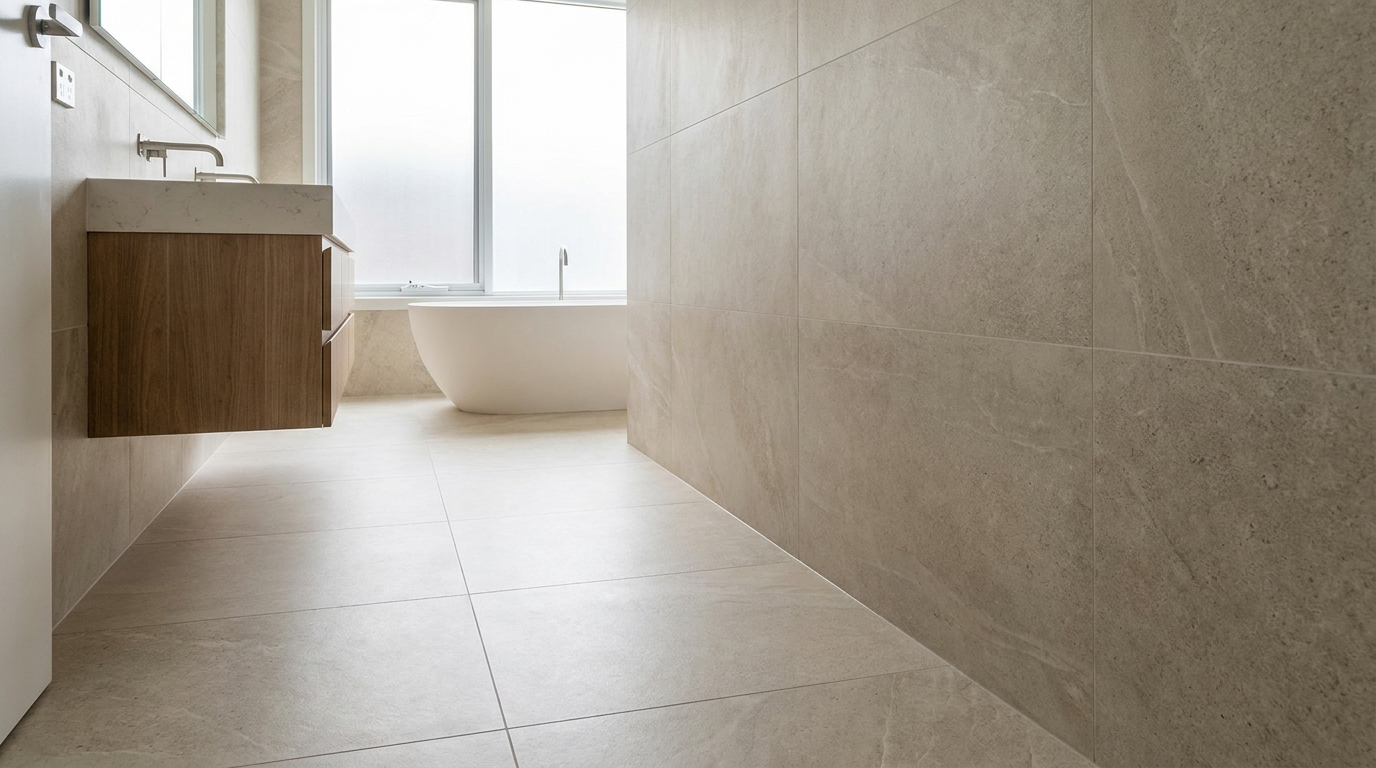
Tile Size
The problem: Small mosaic tiles with dense grout lines visually shrink a compact bathroom, even when the floor area is identical.
What to check:
- Large format tiles (600mm and above) with minimal grout lines typically make a small bathroom feel noticeably bigger.
- Tile direction should follow the room's longest visual axis to maximize the sense of space.
Budget tip: This is one of the highest-impact, lowest-cost decisions on this list — same tiling budget, dramatically different perceived size, just by choosing the right format.
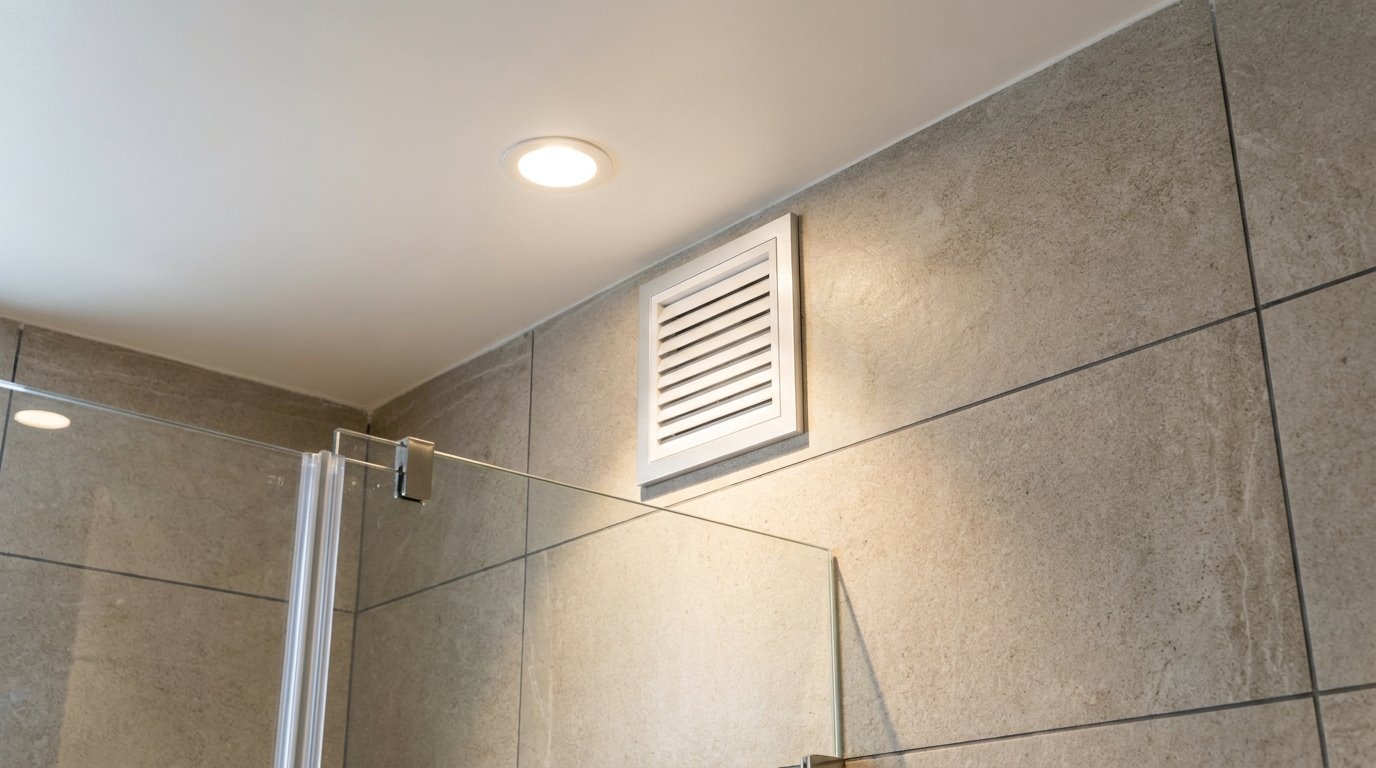
Ventilation and Exhaust Fan Placement
The problem: No fan, or a poorly placed one, leads to fogged mirrors, damp ceilings, and eventually mold and peeling paint.
What to check:
- Is there a planned electrical point for the exhaust fan before the ceiling is finished?
- Is the fan positioned close to the shower zone, where moisture concentrates most?
Why it can't wait: Retrofitting an exhaust fan into a finished ceiling means cutting into completed work. This has to be wired in during construction, not added afterward.
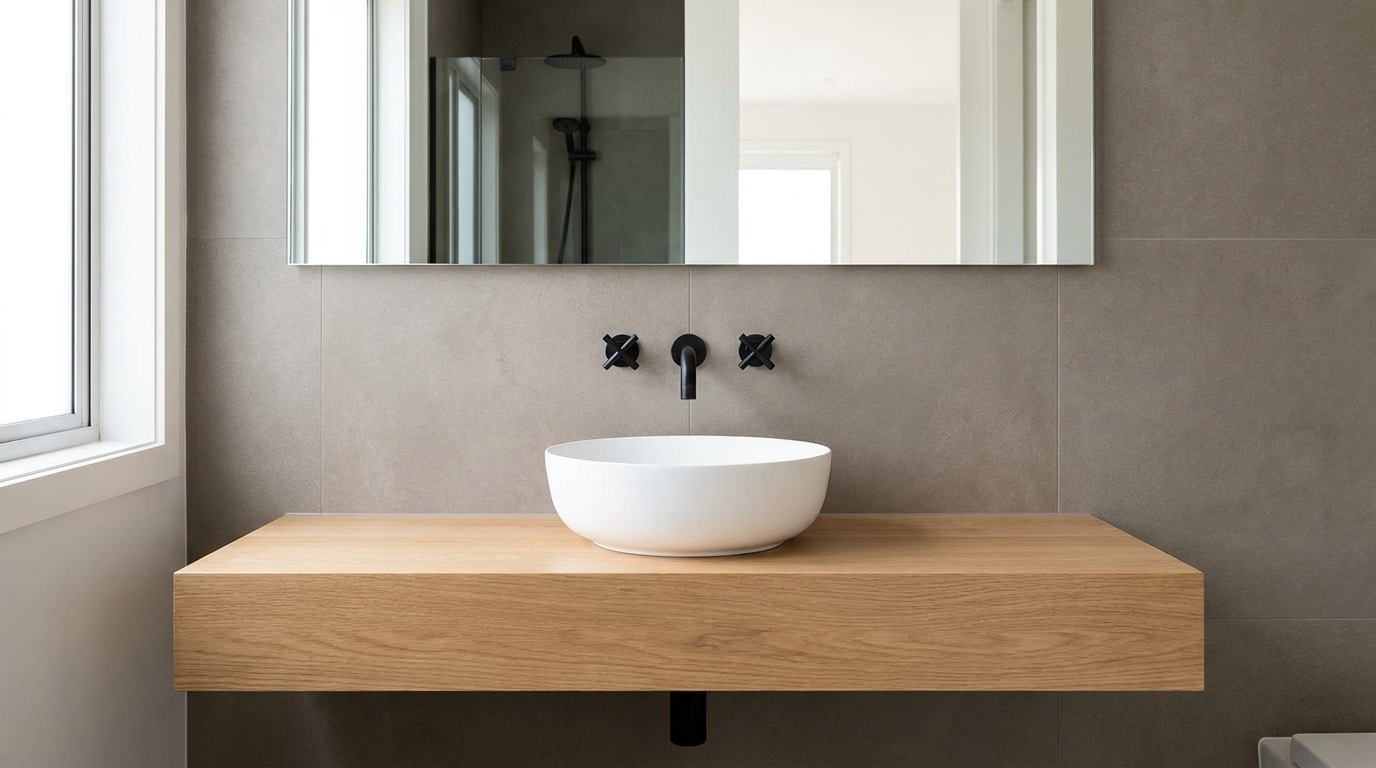
Fixture Height Planning
The problem: Basins, mirrors, and shower heads installed at generic "standard" height often don't actually suit the people using the bathroom — leading to daily small annoyances that no amount of good lighting or tile choice can fix.
What to check:
- Basin height comfortable for standing use without bending
- Mirror centered at eye level for the primary users of the bathroom
- Shower head height appropriate for the tallest regular user
Why it matters more than it seems: This is the kind of decision that's invisible in photos but felt every single day the bathroom is used.
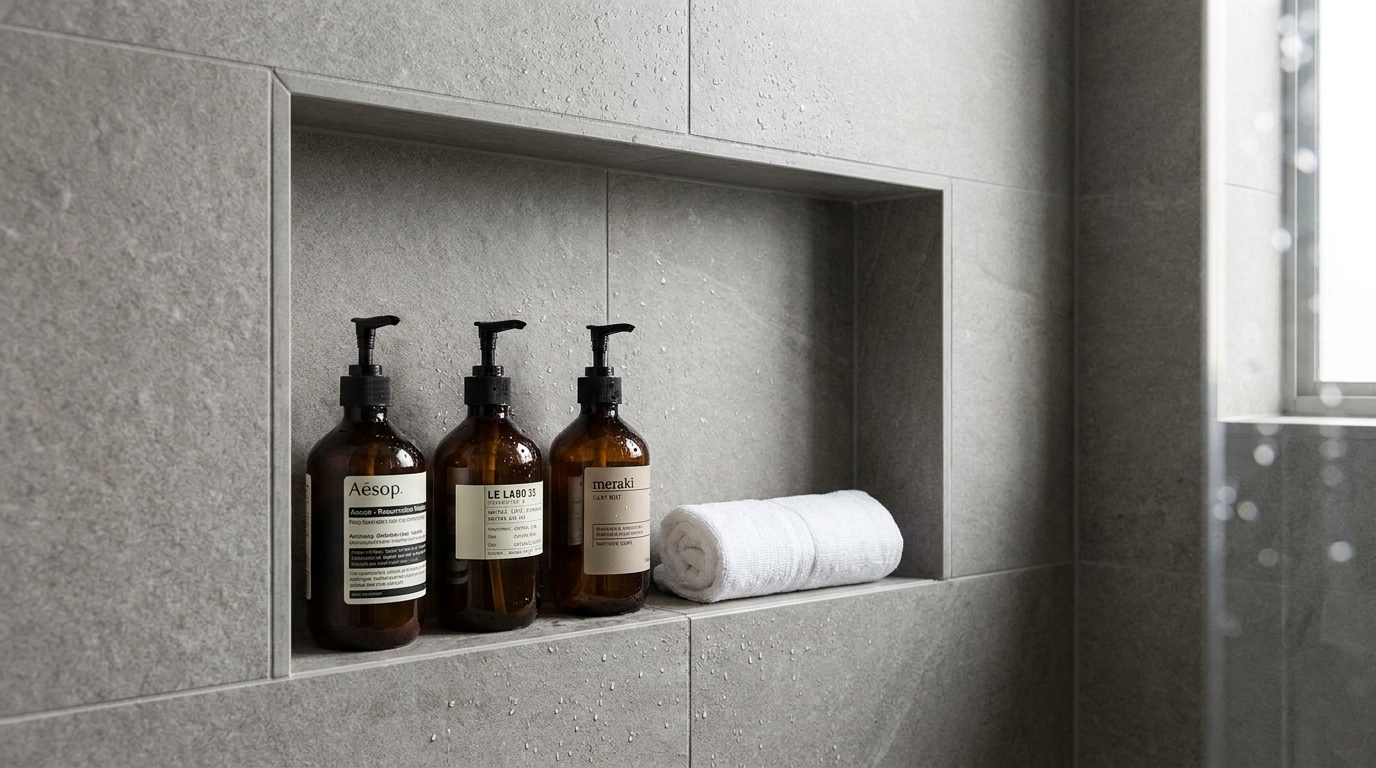
Storage Built Into the Design
The problem: A bathroom designed without storage in mind ends up with a flimsy hanging shelf added after construction — overloaded, slightly precarious, and visually cluttered.
What to check:
- Can a recessed tiled niche be built into the shower wall during construction?
- Is there a planned spot for towels, toiletries, and daily essentials that doesn't rely on an add-on shelf?
Why it's worth planning early: A built-in niche, finished in the same tile as the surrounding wall, solves the same storage problem permanently — and looks intentional rather than improvised.
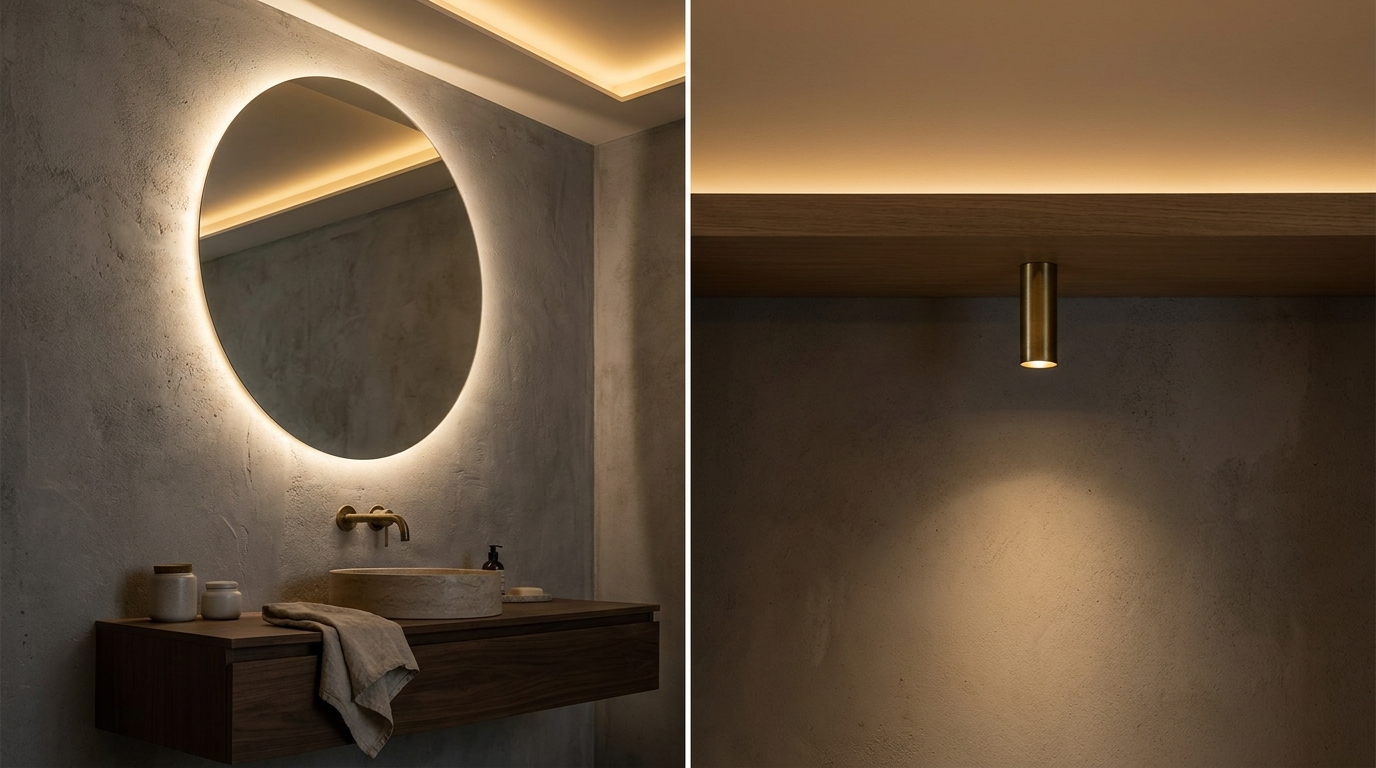
Layered Lighting
The problem: A single harsh overhead bulb is the default lighting setup in most Indian bathrooms — and it's also the least flattering and least functional option.
What to check:
- A warm backlit mirror for grooming tasks
- A soft spotlight above the vanity
- Ambient ceiling lighting for general use
Why one bulb isn't enough: Different tasks in a bathroom — shaving, makeup, showering, general use — genuinely need different lighting. Layering these properly changes the entire mood of the room, not just its brightness.
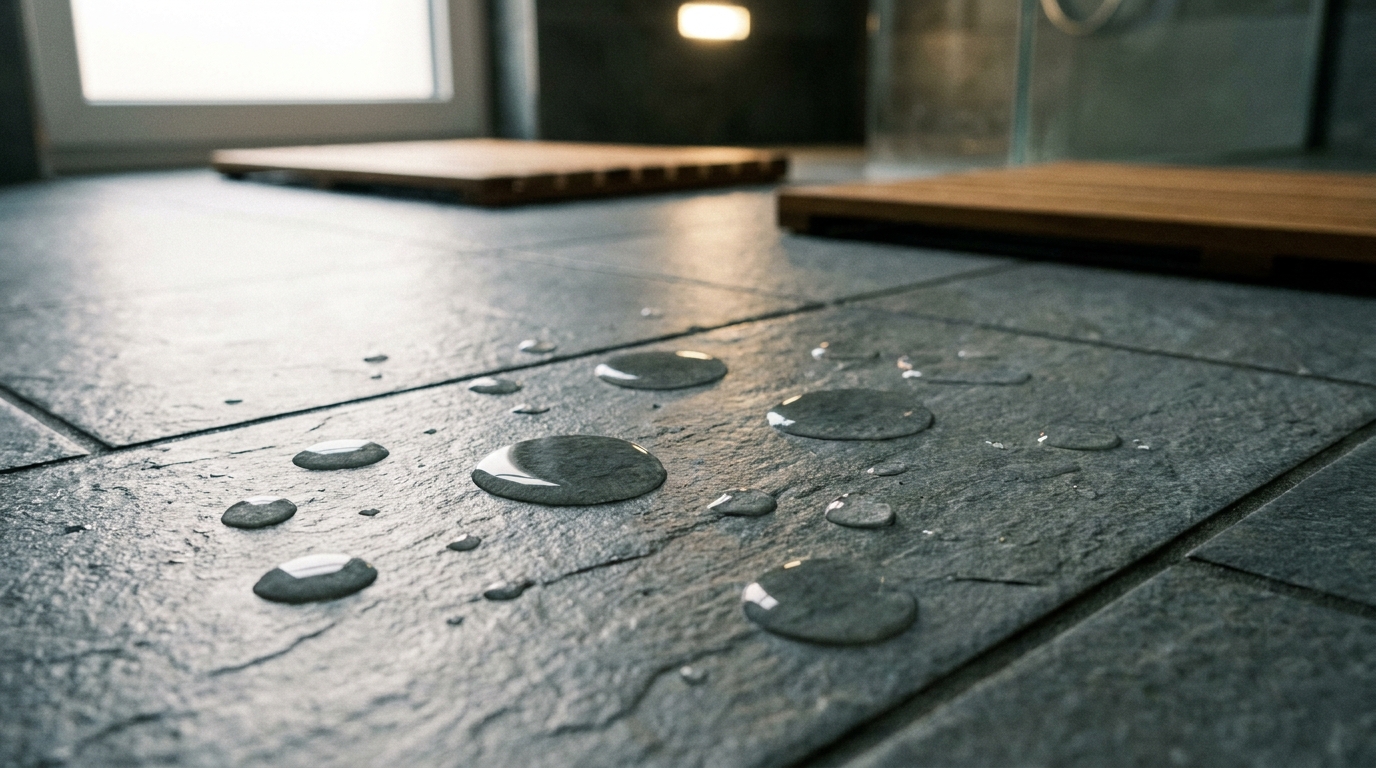
Slip-Resistant Flooring
The problem: Glossy, high-shine tiles photograph beautifully and become genuinely dangerous the moment they're wet — which, in a bathroom, is most of the time.
What to check:
- Choose matte or textured tiles with a slip-resistant rating, especially in the wet zone near the shower
- Don't assume "premium" automatically means "safe" — some of the most expensive glossy finishes are also the most slippery
Why this is last but not least: Flooring is usually one of the final material decisions made, but it carries the most direct safety consequence of anything on this list.
How to Use This Checklist
If you're starting a renovation, work through this list in order:
- Lock in the space plan first — door swing, partition placement, walking path
- Plan the infrastructure second — ventilation electrical point, plumbing layout, storage niche
- Choose the finishes last — tile size and material, fixture height, lighting layers, flooring texture
Most renovation regrets come from doing this in reverse — picking beautiful tiles first and discovering the door swing problem only after the work is done.
Want a real estimate for your home?
Share your home in 2 minutes. We'll match you with verified designers in your city and give you a BOQ-level estimate before any work begins.
Share your home →